BOX TO SHAREPOINT MIGRATION
1. Box to SharePoint migration with Cloudiway
Box to SharePoint Migration is a straightforward process. The Cloudiway file migration platform ensures that your migration runs smoothly and quickly.
This guide shows you how to migrate your content from Box to SharePoint sites (or Teams or OneDrives).
Step by step instructions can be found starting in the What is migrated section.
Performances
When you migrate to Microsoft 365 (SharePoint,Microsoft Teams or OneDrive), it is important to consider several performance aspects to ensure a successful migration.
Data size: The amount of data being migrated can have an impact on the performance of the migration.
Microsoft Graph API have built-in throttling mechanisms. Throttling refers to the limiting of the rate of incoming and outgoing requests to the Microsoft servers, designed to maintain the performance and stability of his services. Consequently, Microsoft is limiting the number of requests per second.
For more information about migration performance, please refer to this article.
Security
At Cloudiway, we prioritize a high level of security for your Box to Microsoft Migration.
Cloudiway infrastructure is fully hosted in Microsoft Azure, and leverages Azure Security certifications. We work closely with Microsoft and are fully involved in large migrations managed by Microsoft. As such, Cloudiway passed the Microsoft SSPA (Supplier Security & Privacy Assurance Program) certification ( Supplier Security & Privacy Assurance )
More information about Cloudiway security is available here:  About Cloudiway Security
Licenses
You need to purchase Cloudiway File Migration Licenses.
Cloudiway platform automatically assigns the licenses. For more details regarding the license management, check out this page.
Delta Passes
Delta pass migration is a Cloudiway functionality that allows you to migrate incrementally. Changes are propagated during delta passes. However, deletions are not propagated.
You can refer to this article for more information : Box To SharePoint delta pass mechanism.
Support
Although we provide support for our products, we do not provide support for third-party products such as server administration, Box administration or Microsoft products. In order to run your Box To SharePoint migration, you must be able to perform the required setup in both Microosft 365 and Box. If this is not the case, you may contact our Sales team and engage our Consulting services.
2. Box to SharePoint migration scope
What is Migrated?
You will find the list of what can be migrated from Box on this page: File migration tool.
Box to SharePoint Migration Considerations
All data can be migrated without any changes to the source structure or permissions. Any users with permissions will need to be listed in a mapping table in order for their permissions to be migrated.
Important: the mapping table must be exhaustive, any missing email address will not be converted, and would end up with loss of file permissions and metadata. Cloudiway automatically populates this mapping table when accounts are discovered by the Get List functionality. However, make sure if the mapping table was populated automatically that you are not missing any email address.
Audience
This guide is aimed at experienced system administrators who are capable of connecting to remote systems and using a variety of administration tools.
If you are concerned you might have any difficulty completing these steps, please consider a solution with our consulting team. This will ensure a fast, cost-effective, and stress-free implementation.
3. Box to SharePoint migration prerequisites
Before you start
Before you start, you will need to ensure you have the details outlined in the following table.
| Name | Description | Location |
| Cloudiway login | Stores details and provides communication between the systems you already use. | https://portal.cloudiway.com |
| Help center | Our extensive help center is always accessible, with videos, troubleshooting tools, samples and more. | https://help.cloudiway.com |
Box Admin
| To configure the Box token and permissions. | https://www.box.com |
SharePoint Administrator Account
| It has to be the primary SharePoint admin account with permissions to the SharePoint site collection. | We recommend you create a migration account, especially for migration. After all migrations are complete, simply delete this account. We provide the steps below to help you set up an account if you don’t already have one. |
| Mapping table and User List (CSV) | Prepare any mapping tables in CSV format, and User List, ready to upload later on. |
|
Source Prerequisites
You need a Box global admin account in order to be able to create and configure the permissions that are required for the connector.The next chapter explains how to create the Box connector and configure its permissions.
Target Prerequisites
An Azure Active Directory application needs to be installed on the Microsoft 365 tenant. Administrator credentials are required for this setup.
The next chapter explains how to create the Microsoft 365 connector and configure its permissions.
4. Box to SharePoint migration process
The Box to SharePoint Migration is a five step process :
- Create the connectors for connecting to the source and the target .
- Create your users manually, through the Discovery process (GetList), or by uploading CSV of users.
- Run an Audit to fully scope the scale of the migration, including how much data will need to be migrated. This step is optional.
- Run a Pre-Processing to pre-create the target and migrate the permissions.
- Run the migration.
4.1 Create your connectors
Box to SharePoint migration requires to communicate with both your source and target tenants.
To do this, Cloudiway uses connectors. You will need to set up a connector for each source tenant you wish to migrate and each target tenant that files should be migrated to.
Follow the steps from this page to configure your Box and Microsoft 365 connectors.
In particular see :
- This article for creating your Box connector
- This article to create a Microsoft connector and register your Azure AD Application
4.2 Create your User List
There are three ways to generate the Box to SharePoint (Or OneDrive) Migration list.
- Manually by creating your entries manually.
- You can run a Discovery to get the list of source users.
- You can upload your users through a CSV file.
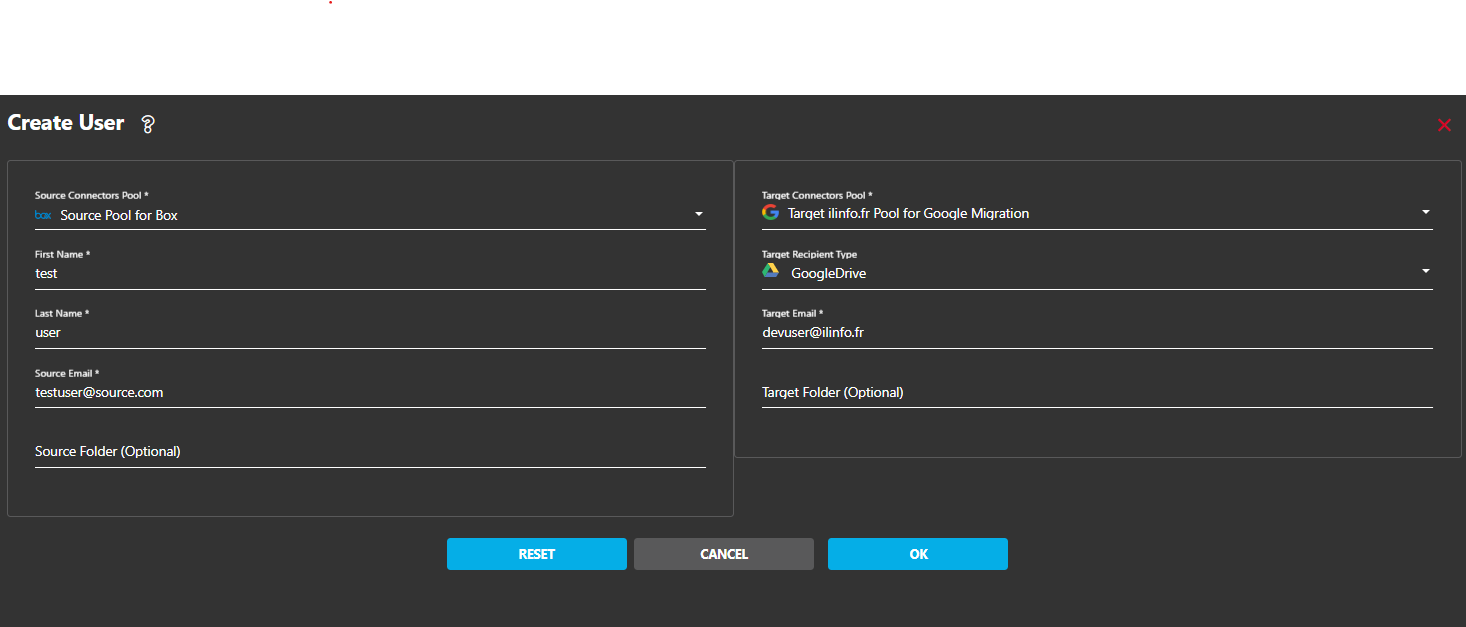
Option 1: Create a single user
Click on MANAGE > Create User and enter the following details:
Option 2: Get List
Cloudiway’s Get List tool helps you to retrieve users from your source tenant and will fill automatically your Box to OneDrive or SharePoint migration list.
From the Migration menu, select Get List.

Enter the Source and Target Pool.
Then specify:
- The Target Recipient Type: SharePoint
- The Matching Rule:
- Mail Exact Match: the source email = the target email (bob.marley@sourcedomain.com > bob.marley@sourcedomain.com)
- Keep Email Prefix Same as Source: only the domain name changed (bob.marley@sourcedomain.com > bob.marley@targetdomain.com)
- FirstName.LastName (i.e. bob.marley@targetdomain.com)
- F.LastName (i.e. b.marley@targetdomain.com)
- FLastName (i.e. bmarley@targetdomain.com)
- LastNameF (i.e. marleyb@targetdomain.com)
- The Target Domain.
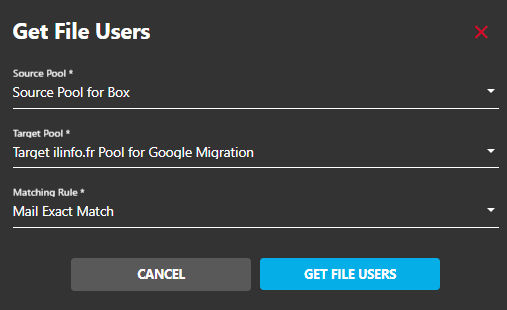
Click On Get User List. Once the Get List job is completed, the list of users will appear in the User List.
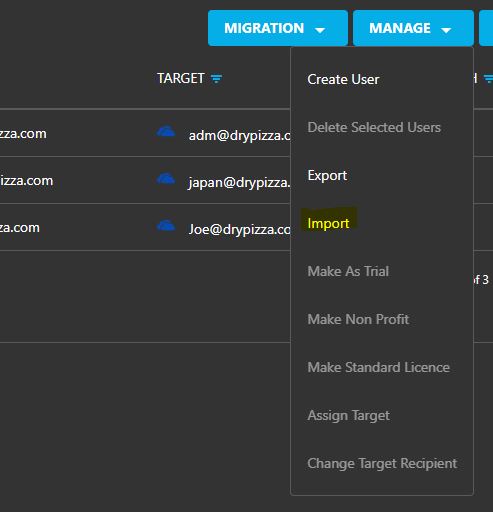
Option 3: CSV File Import
If you have a CSV file of all your users, you can upload the file to Cloudiway.
1. Navigate to Files > User List
2. Click on Manage on the action bar and select Import
3. If required, click on Download sample CSV and add your users to the CSV file.
This article explains how to fill the CSV file.
4. When you have a complete CSV file with the correct headers, click on the BROWSE button.
5. Locate your CSV file within your own file system, and select it.
6. Select the appropriate connectors in the Source and Target fields.
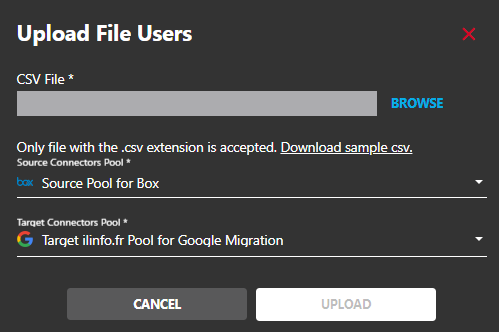
7. Click on the UPLOAD button
If you see any error messages, check your CSV file, and try uploading again.
8. Once the CSV file format is correct, you will see a confirmation message.
4.3 Audit your drives
The audit is optional and purely informative.
It helps determine the volumetry and number of files to migrate.
You can use the audit results to decide where you want to migrate: To a SharePoint site, Microsoft Teams or OneDrive.
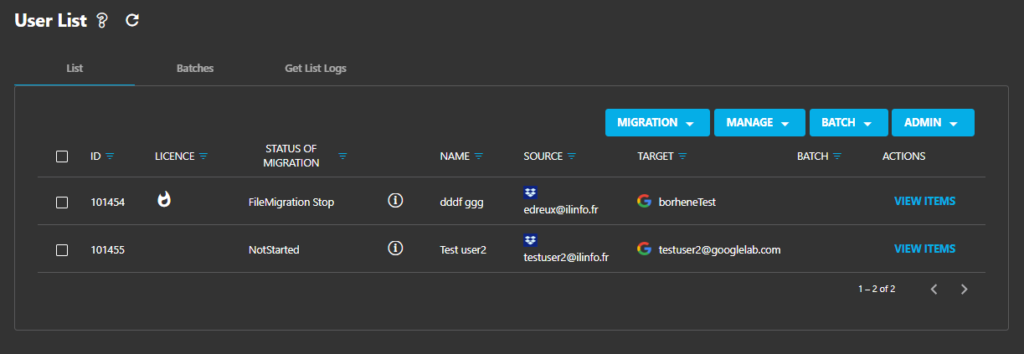
1. From the User List , select the users to audit.
2. From the action bar, click on MIGRATION, then Audit, the status change to FileAudit Scheduled
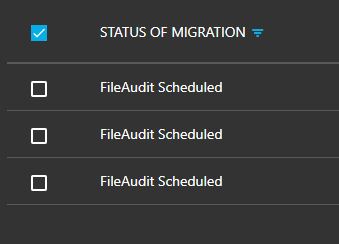
3. Refresh periodically your page and verify the status.
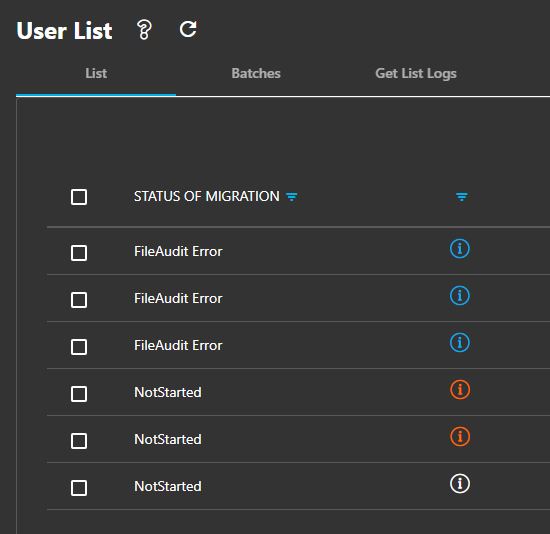
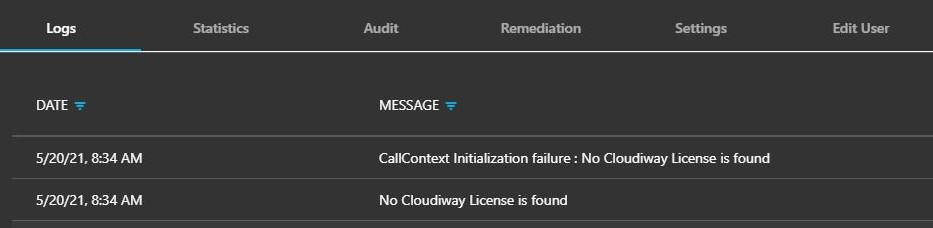
4. If there is an error, click on the line to edit the entry. In the Logs tab, check the Error message in the logs. Licenses are missing in this case; contact your sales representative or purchase more licenses on the platform, then try again.
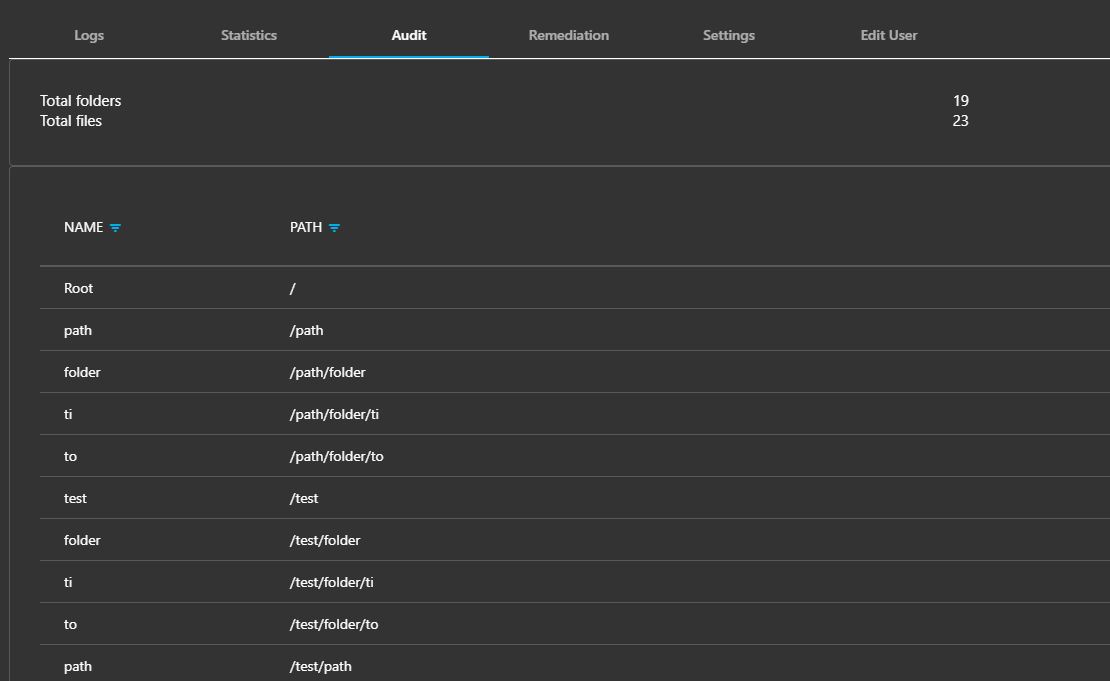
5. To check the result of the audit, edit the line and then click on the Audit tab;
4.4 Preprocessing
When your Cloudiway connectors are set up, you are ready to perform your Box to SharePoint Migration. Before launching the migration, you need to run the preprocessing task at least one time. This task can be run more than once if required. The preprocessing task will precreate the SharePoint Site, Team or OneDrive and migrate the permissions.
- From the User List area, select the users to preprocess (you can use the checkbox at the top of the list to select all)
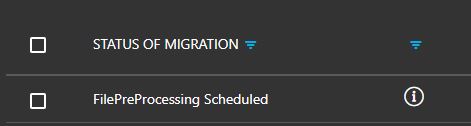
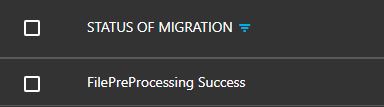
- From the action bar, click on MIGRATION, then PreProcessing, the status change to FilePreProcessing Scheduled
Periodically refresh the pages to update the status.
4.4 Migrate
Now that you have performed all the pre-migration steps within your tenants and Cloudiway, you’re ready to migrate. We recommend you run a test migration on a single user first to check that your configuration produces the outcome you expect.
To start your migration, select the users or batch and click on MIGRATION, then Start button. Your batch will be scheduled and will begin as soon as resources are available.
Don’t forget that Cloudiway migration platform supports delta passes and that migrations are therefore incremental.
Every time you restart the migration, only items that haven’t already been copied to the target — or that have been changed since they were copied to the target — will be migrated.
You can monitor your migration from the dashboard.
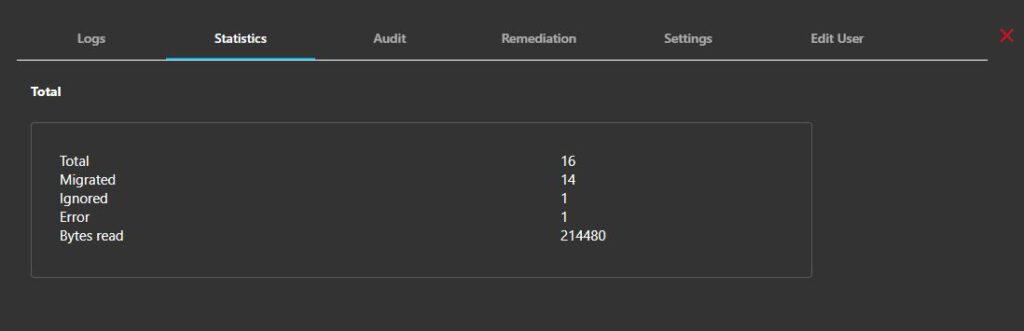
If you require more information, you can click on any entry in the User List and navigate to the Audit , Logs, or Statistics.
5. Migrate to specific folder
It is possible to split and reorganize your content.
In particular, you may want to migrate only specific folders or to migrate content to a specific folder. You can refer to the following article to determine how to configure the migration platform for these specific scenario:
https://help.cloudiway.com/article/how-to-migrate-files-from-or-to-a-specific-folder/
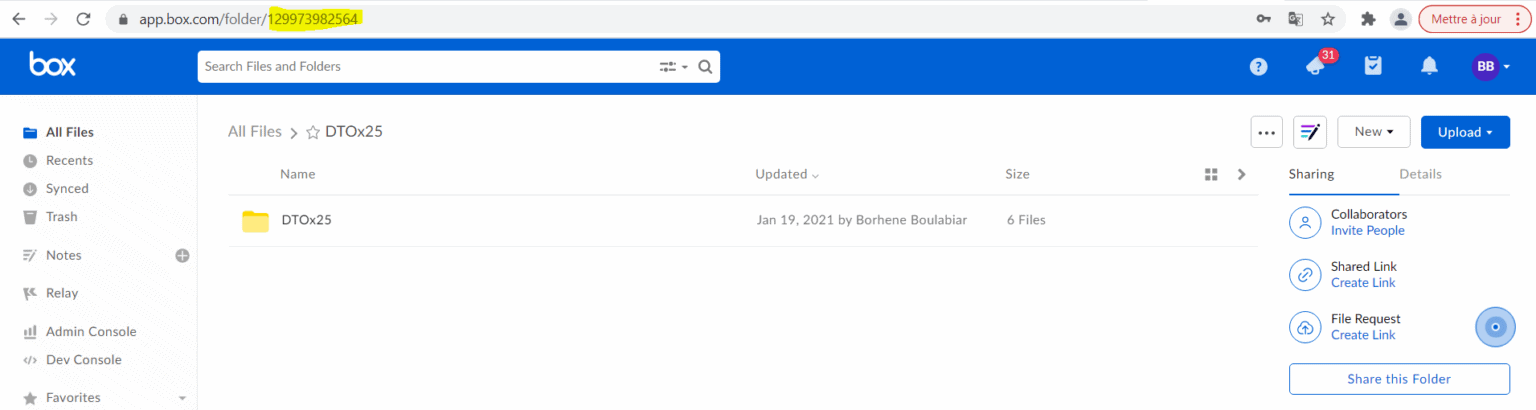
5.1 Exclude folder
If you want to exclude different folders from the migration, enter the Folder ID or Folder Path.
You can get the Folder ID from the URL, you don’t need to enter the Folder Path:
6. Box Migration Global Settings
Global settings are fully covered in this article:
Migration Global Settings
7. Troubleshooting
Cloudiway provides an extensive help center with many resources, including common error messages, video guides: https://help.cloudiway.com/
The help center also contains information on how you can ask for further support, should you require it.
If you didn’t find a response in this admin guide neither the help center, you could send a ticket from the HELP menu, then Support.
Additional resources: