4.1 Create Your Connectors
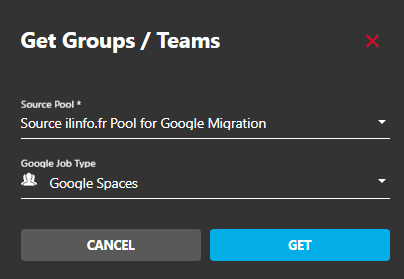
4.2 Discovery
Option 1 : Get List
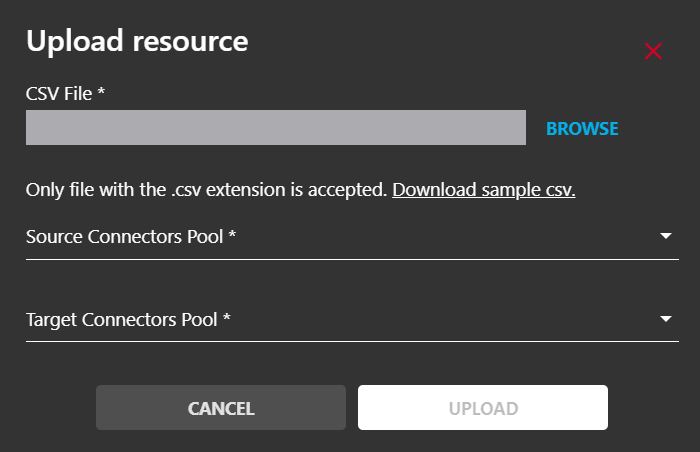
Option 2 : CSV Import File

After uploading a CSV file, there is no need to define the source and target location.
Option 3: Manual Creation
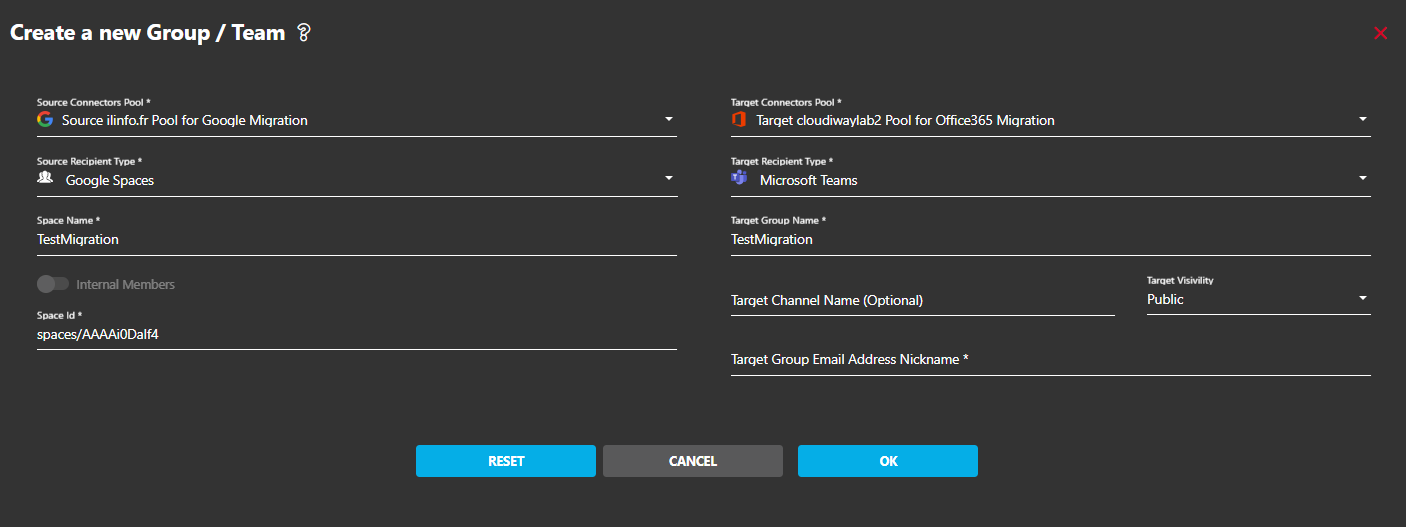
4.3 Configure the Target Location
If you want to migrate into a specific channel, set the name of the team in the Target Name field, and the name of the channel in the Target Channel Name field.
If you leave these fields blank, the Space will be migrated into the general channel of the team.
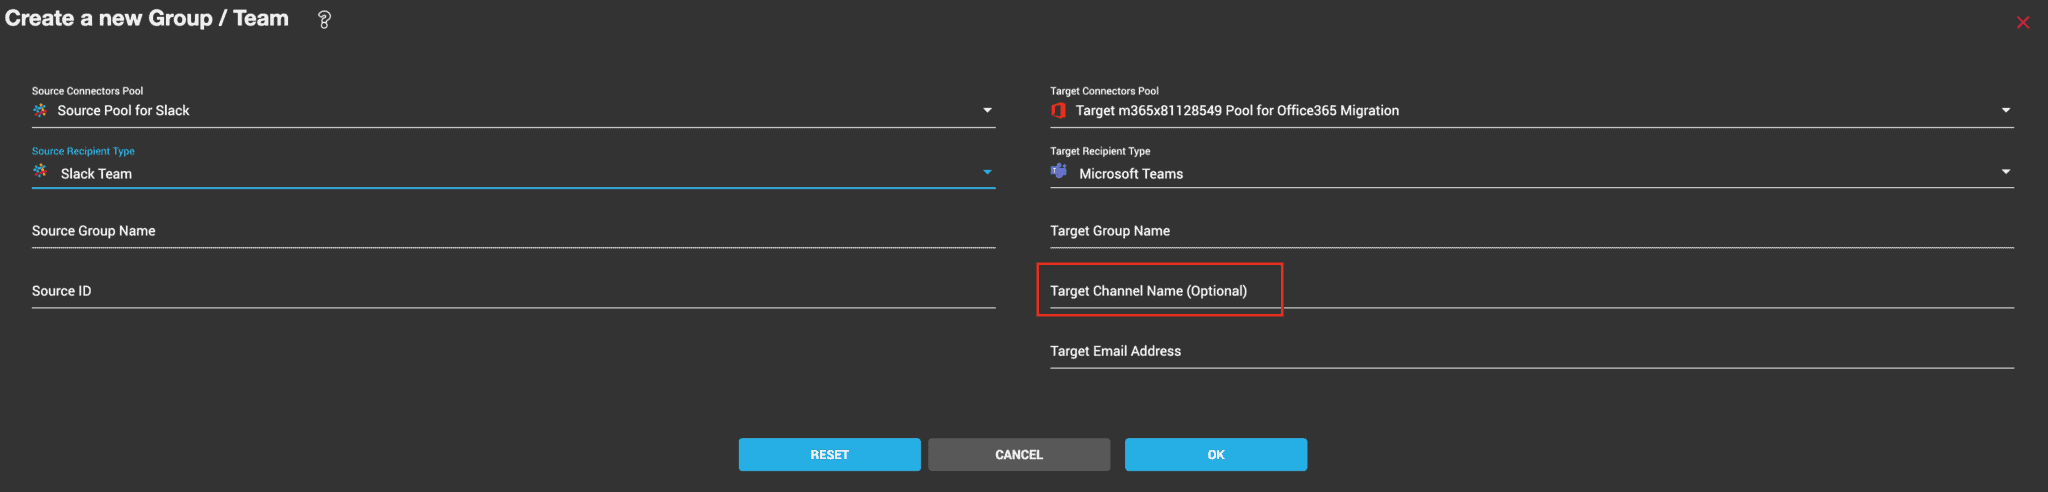
If the team or the channel doesn’t exist in the target, it will be created during the pre-processing task.
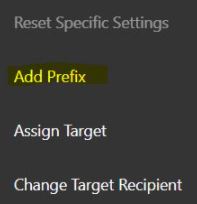
4.4 Mass modify your list
You have run a discovery and it has pulled all your Spaces. However the target location is not filled and you don’t want edit the list one by one.
You can run the 3 options from the menu (Add Prefix, Assign Target and Change Target Recipient) to mass modify your list.
Assign Target : It will automatically assign a target connector to the selected entries.
Add Prefix: It automatically rename and add a prefix to the selected entries (in Target Group Name and Target Group Email Address).
Change Target Recipient: It automatically set the Recipient Type.
In the Group List, check one or more objects that you want to modify. Go to MANAGE, then run the action your choice:
4.5 Mapping Table
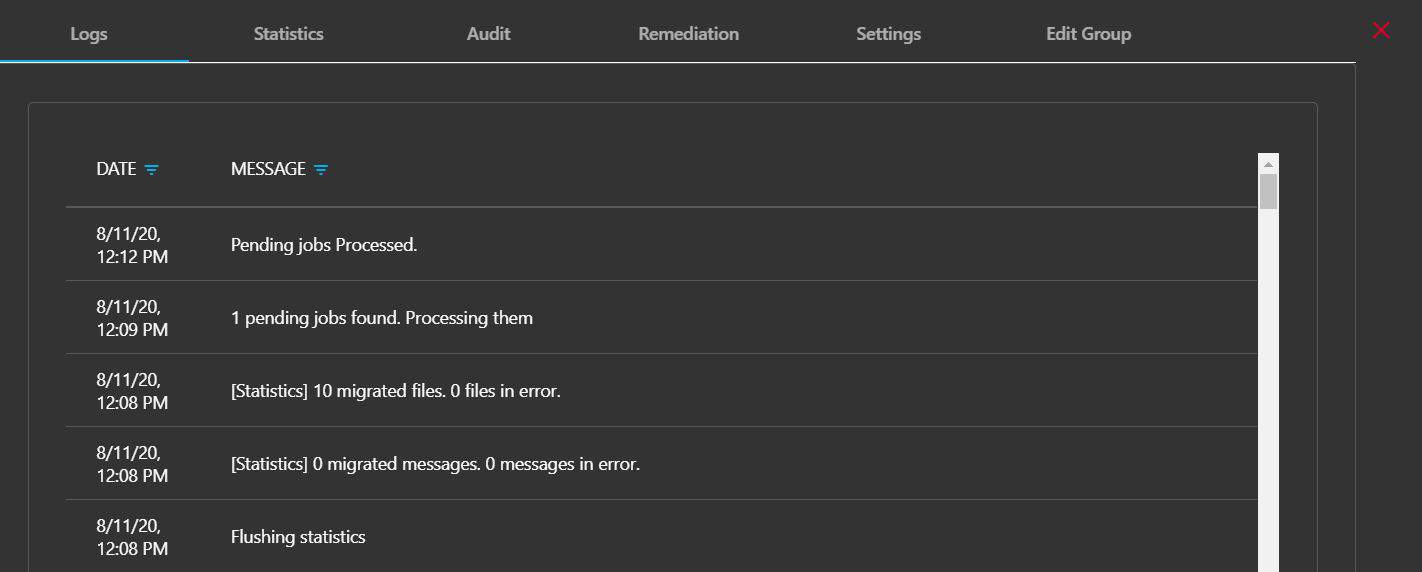
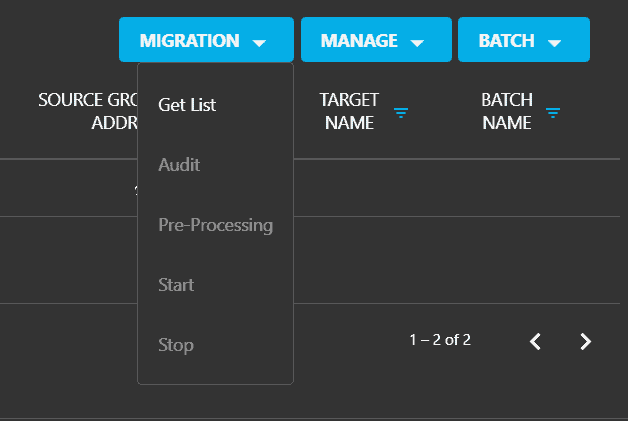
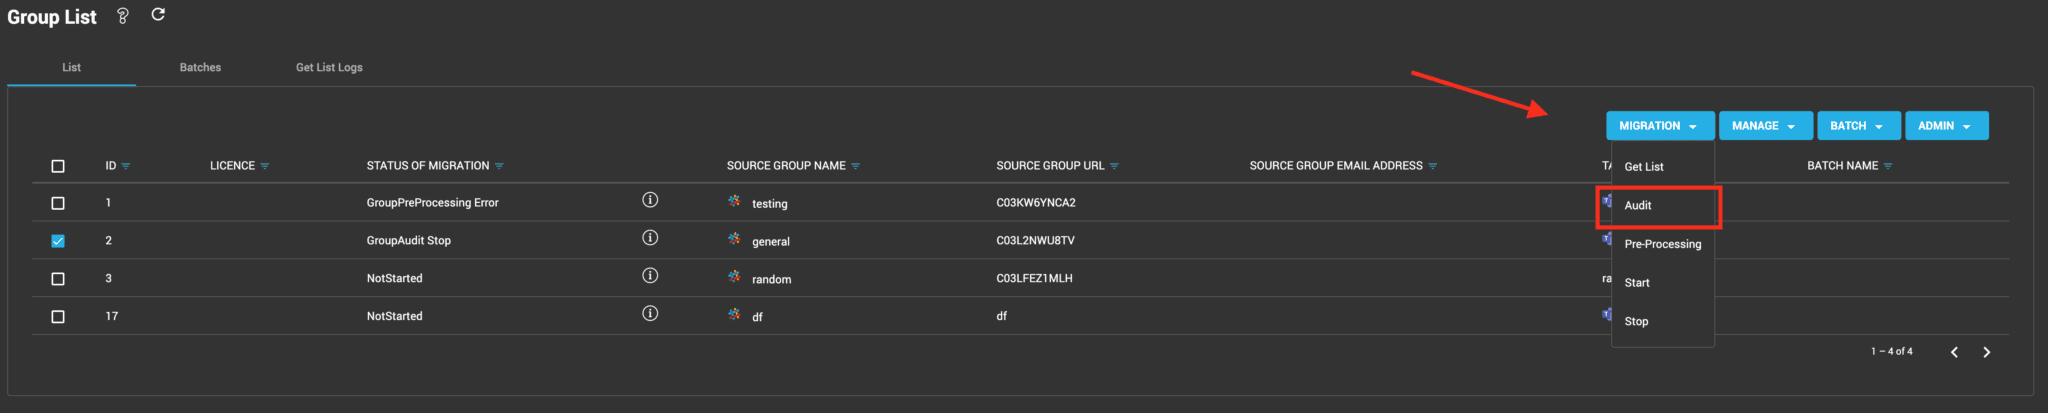
4.6 Audit
The audit is optional and purely informative.
The audit connects to the source Space and counts the number of messages, replies and files.
To run the Audit, in Group List, select an entry and click MIGRATION > Audit.
4.7 Preprocessing
4.8 Migration